In today’s digital landscape, managing and optimizing your website’s links is crucial for maximizing click-through rates and protecting your affiliate earnings. WP Safelink Pro is a powerful WordPress plugin designed to help you achieve just that. It offers a range of features, including the ability to create “safelinks” – cloaked or masked links that redirect users through an intermediary page. One of the key features of WP Safelink Pro is its integration with Google Redirect. This allows you to leverage the power of Google’s infrastructure to further enhance your link management strategy.
This tutorial will guide you through the process of using Google Redirect with WP Safelink Pro. We’ll cover everything from enabling the feature to configuring it for your specific needs. By the end of this guide, you’ll be able to effectively use Google Redirect to protect your affiliate links, improve your click-through rates, and enhance your overall link management strategy. This tutorial assumes that you have already installed and activated the WP Safelink Pro plugin on your WordPress website. Let’s dive in!
Accessing WP Safelink Pro Settings
After installing and activating WP Safelink Pro, you can access its settings through your WordPress dashboard. Navigate to the WP Safelink menu item in the left-hand sidebar.
Clicking on WP Safelink will open the plugin’s settings page, where you can configure various options, including the Google Redirect feature. As you can see in the screenshot, the menu is clearly labeled, making it easy to find.
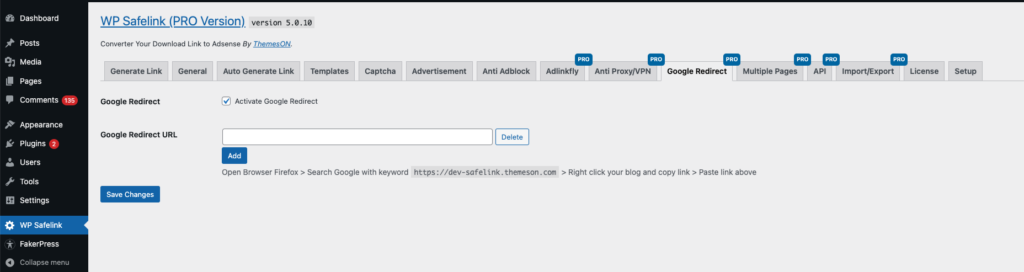
Enabling Google Redirect
Once you’re on the WP Safelink Pro settings page (as shown in the previous section), you’ll see a tab labeled Google Redirect. Click on it to access the Google Redirect settings.
Within the Google Redirect tab, you’ll find a checkbox labeled Activate Google Redirect. Simply check this box to enable the feature.
Once you’ve checked the box, click the Save Changes button at the bottom of the page to apply your settings.
Google Redirect URL
After you activate the Google Redirect you need to have Google Redirect URL for redirecting traffic from the link into Google Redirect first.
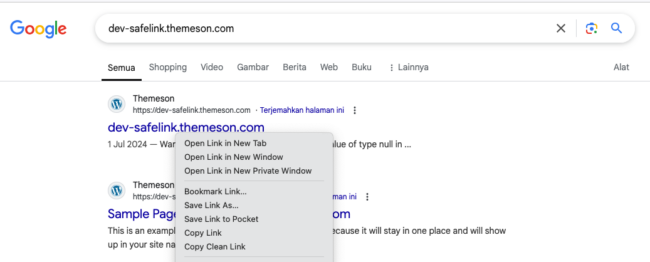
Click the copy link then you will get url like this
https://www.google.com/url?sa=t&source=web&rct=j&opi=89978449&url=https://dev-safelink.themeson.com/&ved=2ahUKEwjLzcipoc-LAxVZ3TgGHWFMPe8QFnoECAYQAQ&usg=AOvVaw2dfYm99Pgo_C_uLQUi7RQr
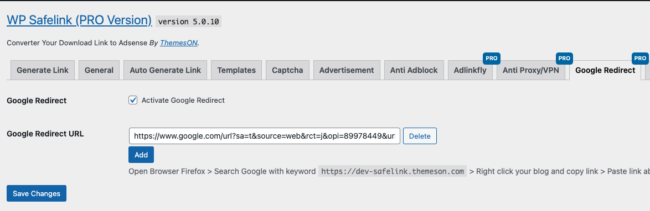
After that you can copy and paste into your Google Redirect URL
In conclusion, by utilizing Google Redirect with WP Safelink Pro, you can effectively manage and optimize your website’s links while ensuring a safe and positive experience for both your audience and search engines. With this feature, all incoming traffic to your website will be redirected through Google’s infrastructure before reaching your site, providing an added layer of security and protection. This not only safeguards your website from potential threats but also helps improve your site’s reputation in the eyes of Google, leading to better search rankings and increased visibility. So, start leveraging the power of Google Redirect with WP Safelink Pro today and take your link management strategy to the next level.