In this tutorial, we will walk you through the process of integrating Adlinkfly with WP Safelink. This integration allows you to use Adlinkfly’s link shortening and monetization features in conjunction with WP Safelink’s link cloaking and redirection capabilities.
Requirements
Before we begin, please ensure you have the following:
- An Adlinkfly domain (e.g., https://demo-adlinkfly.themeson.com/)
- A WordPress installation with WP Safelink Client Version (e.g., https://link.themeson.com)
- A WordPress installation with WP Safelink Server Version (e.g., https://demo-safelink.themeson.com/template1/)
- An empty domain with its root path on the same server as your Adlinkfly installation (e.g., https://redir.themeson.com)
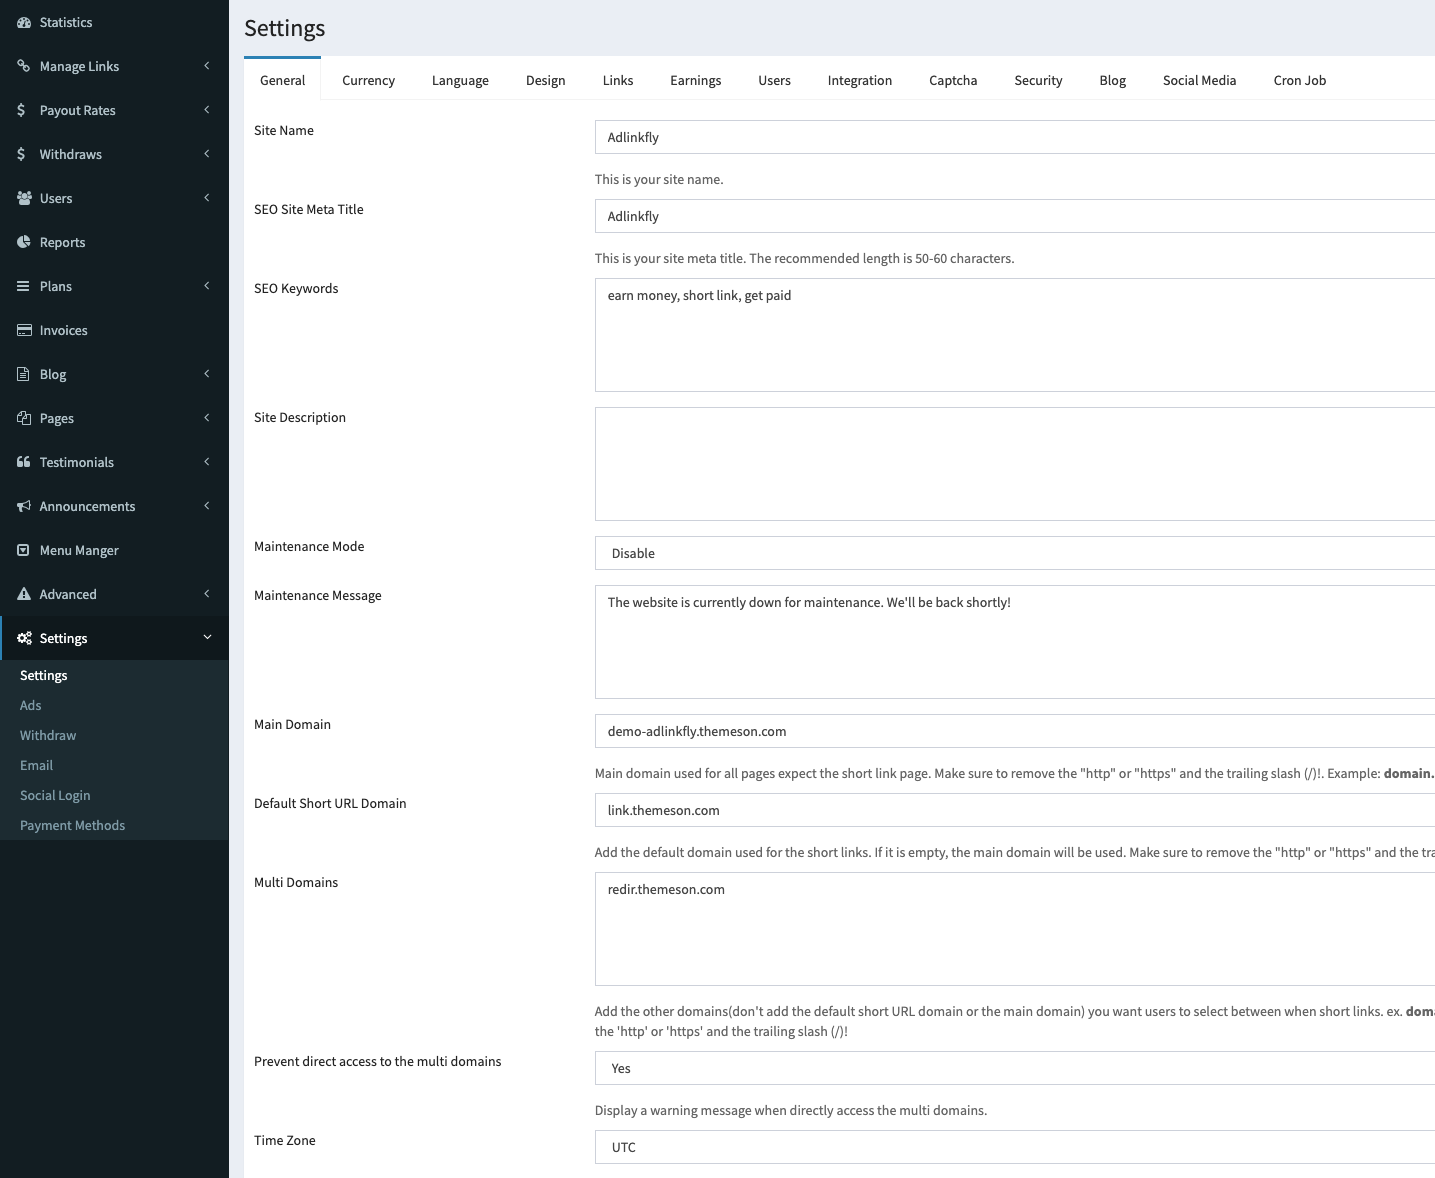
1. Adlinkfly Configuration
-
Access General Settings:
- Log in to your Adlinkfly dashboard.
- Access the general settings page by navigating to
/admin/optionsor through Administrative Area > Settings > General.
-
Main Domain:
- In the “Main Domain” field, enter your primary domain for Adlinkfly.
- Crucially, remove “http://” or “https://” and any trailing slash at the end of the URL.
- Example:
demo-adlinkfly.themeson.com
-
Default Short URL Domain:
- In the “Default Short URL Domain” field, enter the domain you want to use for your shortened links.
- If left blank, the main domain will be used.
- Example:
link.themeson.com - Note: Again, remove “http://” or “https://” and any trailing slash at the end of the URL.
-
Multi Domains:
- In the “Multi Domains” field, you can add other domains you want to use.
- These domains will allow users to choose which domain they want to use for their short links.
- Example:
redirect.themeson.com - Important:
- Do not enter the main domain or the default short link domain here.
- Separate each domain with a comma, with no spaces.
- Remove “http://” or “https://” and any trailing slash at the end of the URL.
- These domains should be parallel or aliased to your main domain.
Configuration Example
Here’s how you should fill in your Adlinkfly settings based on the provided requirements:
- Main Domain:
demo-adlinkfly.themeson.com - Default Short URL Domain:
link.themeson.com - Multi Domains:
redirect.themeson.com
2. WP Safelink Client Version Integrator
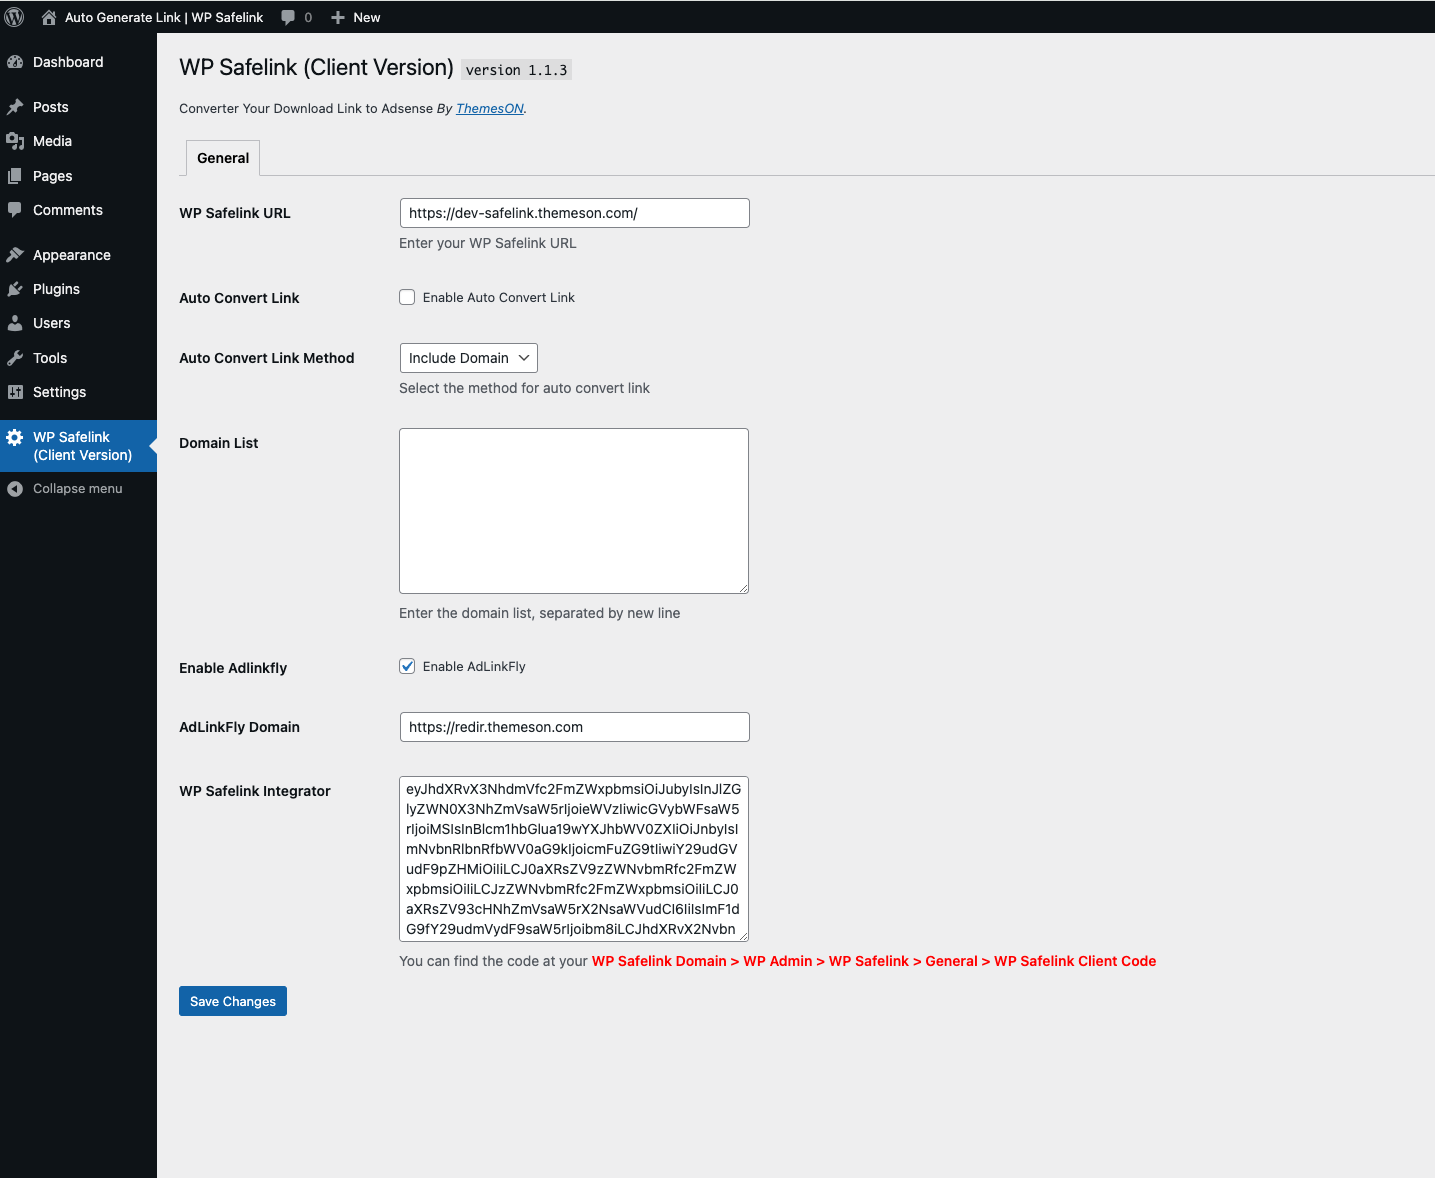
Here’s the configuration process for the WP Safelink Client Version Integrator, using link.themeson.com as an example domain, and based on the screenshot you provided.
-
Access WP Safelink Client Settings:
- Log in to the WordPress dashboard where you have WP Safelink Client Version installed.
- Navigate to the “WP Safelink (Client Version)” menu in your admin sidebar.
-
General Settings:
- WP Safelink URL: Enter the complete URL of your WP Safelink Server installation. Example:
https://dev-safelink.themeson.com/
- WP Safelink URL: Enter the complete URL of your WP Safelink Server installation. Example:
-
Adlinkfly Integration:
- Enable Adlinkfly: Enable this option to integrate your WP Safelink Client with Adlinkfly.
- AdLinkFly Domain: Enter your Adlinkfly domain. Example:
https://redir.themeson.com - WP Safelink Integrator: This is a unique code that connects your WP Safelink Client to your WP Safelink Server. This code can be found in your WP Safelink Server dashboard under WP Admin > WP Safelink > General > WP Safelink Client Code. Copy this code and paste it into this field.
-
Save Changes:
- After you’ve entered all the necessary settings, click the “Save Changes” button to save the configuration.
3. WP Safelink Server Version
No special configuration on here, just setup WP Safelink Server Version and the client and server version will connected each others.
4. Real Adlinkfly Domain URL (redir.themeson.com)
Okay, let’s outline how to create a subdomain via cPanel with the same root directory as your Adlinkfly installation. This is a crucial step to ensure your multi-domains or other related services function correctly.
-
Log in to cPanel: Access your cPanel control panel using the credentials provided by your hosting provider.
-
Navigate to Subdomains: Look for the “Domains” or “Subdomains” section. The exact wording might vary slightly depending on your cPanel theme. Click on “Subdomains.”
-
Create the Subdomain:
- In the “Subdomain” field, enter the name of the subdomain you want to create (e.g.,
redir). cPanel will automatically append your main domain to it. - Crucially, in the “Document Root” field, you need to specify the exact same directory path as your Adlinkfly installation. This is the most important part. Do not let cPanel create a new directory. You must manually enter the path.
- In the “Subdomain” field, enter the name of the subdomain you want to create (e.g.,
-
Finding Your Adlinkfly Root Path:
- If you are unsure of the exact path, there are a couple of ways to find it:
- File Manager: Use cPanel’s File Manager. Navigate to your Adlinkfly installation. The path displayed in the File Manager’s address bar is your root path.
- Contact Support: If you’re still unsure, the easiest way is to contact your hosting provider’s support. They can quickly tell you the correct path.
- If you are unsure of the exact path, there are a couple of ways to find it:
-
Example:
- Let’s say your Adlinkfly installation is in the directory
/home/yourusername/public_html/adlinkfly. When creating theredirsubdomain, your “Document Root” should be/home/yourusername/public_html/adlinkfly.
- Let’s say your Adlinkfly installation is in the directory
-
Create: Click the “Create” button.
-
DNS Records (If Necessary): In most cases, cPanel will automatically create the necessary DNS records for your subdomain. However, if you encounter any issues accessing the subdomain, you might need to manually add a CNAME record in your DNS settings. This will point your subdomain to your main domain. Your hosting provider can assist you with this if needed.